
If you make edibles or cook with marijuana, you must first decarboxylate the plant material. It is a complicated term for an easy process. Decarboxylation is actually only warming up your marijuana so that all effective substances are released. Read this article and learn all about decarboxylation of marijuana.
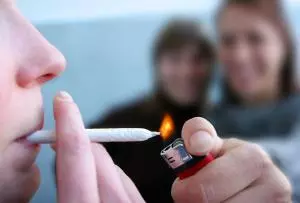
If you want to enrich food with cannabis, then decarboxylation is a must. You actually do the same with smoking or vaping marijuana: you heat it up. Have you ever lit a joint? Then you have already decarboxylated marijuana.
This process of decarboxylation is therefore essential when infusing food with cannabis. Without decarboxylating first, it will have no effect and the cannabinoids from the flower tops will not do their magic thing.
If you bake something with cannabis, a heating process will automatically take place. But if you want to get the most out of your buds, it is still a good idea to do a decarboxylation process first. The effect will then be stronger.
What is decarboxylation?
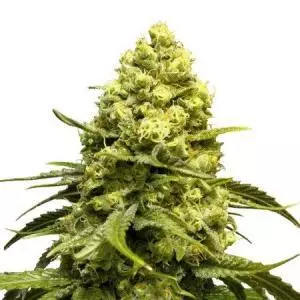
Marijuana consists of a carboxylic acid. This ensures you don’t experience a high from raw cannabis. However if you heat cannabis to smoke, vape or cook, the carboxylic acid disappears. This activates the cannabinoids and unblocks the psychoactive effects. Now you understand why the buds are dried and cured first, otherwise they cannot burn. And it is precisely because of the burning/heating that the chemical compositions of the cannabinoids change. For example, THCA becomes THC. THCA (before heating) is not psychoactive. But THC (after the heating) gets you psychoactive high.
What methods are there to decarboxylate cannabis?

It’s all very simple. You take a quantity of weed and grind it. Make sure that it is ground so finely that you can evenly distribute it over a baking tray. Place a sheet of baking paper on the baking tray and spread all the weed evenly. Now place the tray in the oven and bake the cannabis for about an hour at 100 degrees. If you bake for a long time at a low temperature, you will prevent it from burning, but you will ensure that all effective substances become active.
In order to experience the full-throttle of marijuana, you should expose it to the decarboxylation. But did you know that you can decarboxylate your marijuana at home? This article will guide you on three methods of decarboxylating marijuana. Without further ado, let’s dive in.
- Decarboxylation is a mason jar
- Decarboxylation is an oven
- Decarboxylation by sous vide

Decarboxylation in a mason jar
Decarboxylation of marijuana in a mason jar is gaining a lot of popularity, thanks to its ability to minimize the strong odours. When you use a mason jar to decarboxylate the marijuana, terpenes in the marijuana stick to the glass. A mason jar also prevents cannabis from burning during the decarboxylation process. Having discussed the above benefits, how do you go about the decarboxylation process? Here is a quick guide.
What you need
- Oven gloves
- Baking tray
- Marijuana bud(s) strain of your choice
- Mason jar with tray
- Kitchen towel
Directions
- Put the oven on a source of heat until it attains a temperature between 220- and 240-degrees Fahrenheit. Ensure the rack of the oven is placed in the middle of the heat for it to absorb it evenly.
- Crush the marijuana buds into small pieces until they attain the size of grains of maize. Put the crushed marijuana buds into the jar and lightly cover it with the lid.
- Put the kitchen towel into some water to make it slightly wet, then put it above the baking sheet. Transfer the mason jar into the towel to make them come into contact.
- Put the baking tray on the oven and let it bake for one hour. After every 15-20 minutes, you should remove the mason jar from the oven using the oven gloves then shake it to ensure all the marijuana receives heat evenly.
- Remove the mason jar from the oven and allow it to cool for half an hour. You can use the decarboxylated marijuana immediately or store for future use.

In the distinguished sphere of cannabis cultivation, the Amsterdam Seedbank, colloquially known as the AMSB, has garnered a reputation of distinction and reverence, dedicating numerous decades to the meticulous preservation and expert breeding of original landrace marijuana seeds strains, thereby fostering a rich heritage of botanical excellence and genetic diversity that is unparalleled globally.
Decarboxylation of cannabis in an oven
Although decarboxylation in an oven is very popular, it still remains the most delicate. You cannot afford to make minor mistakes in since it will cost your cannabis. There are several factors that might affect the decarboxylation of your favourite cannabis.
First, temperatures in an oven might vary by a difference of 20 degrees which could be fatal to your marijuana. To avoid the mess, you should invest in a thermometer to keep an eye on the temperatures. Second, you should turn off the oven anytime you note the marijuana starting to burn.
How to do it step-by-step?
What you need
- Your preferred bud(s) of marijuana buds
- Baking tray made of high-quality material such as Pyrex
- Parchment paper or an aluminium foil
Directions
- Put the oven on a source of heat to 225 degrees Fahrenheit. Ensure that it is at the centre for even distribution of heat. This is very vital since it exposes the cannabis to a uniform amount of heat.
- Cut a small piece of the parchment paper (aluminium foil), crumble it a bit, and put it across the baking sheet. Covering the baking sheet prevents marijuana from coming into direct contact with the baking sheet. The baking sheet being a good heat conductor might cause it to burn marijuana.
- Crush the marijuana buds until they become the size of grains of rice then spread it on the aluminium foil. Put another aluminium foil on top of the crushed marijuana then place the baking sheet on the oven. Allow it to bake for about 45 minutes until the marijuana is ready.
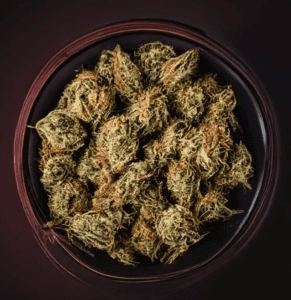
- Take the baking sheet off the oven then let it cool to room temperature. The cannabis will have turned golden brown. You can then use the carboxylate cannabis or store for future use.
Decarboxylation of cannabis by sous vide
The sous vide the ideal decarboxylation method for the big wigs. It is pricey, but the cost is justified, factoring in the reliability and quality of marijuana. It is one of the most sophisticated processes in the cannabis industry. Can you figure out how the immersion circulator allows you to put temperature under check in order to the marijuana flavour and terpenes?
What is the decarboxylation of marijuana by sous vide?
What you need
- Marijuana bud(s) of your preferred strain
- Zip-toe freezer bag or a vacuum sealer
- Immersion circulator
- Container for immersion circulator (you can also use a plastic tub or a large pot)
Directions
- Pour hot water in the container for immersion circulator and put an immersion circulator in it. Follow the user manual and do not fill it to the brim. Turn the immersion circulation up to 203 degrees Fahrenheit.
- Crush the marijuana until its particles become the same size as grains of rice.
- Spread the fine particles and cover them with the zip-top plastic bag or a vacuum sealer. Ensure that the seal on the cannabis is as tight as possible to prevent air from getting inside.
- Put the sealed cannabis in the hot water bath for one and a half hours. After it is fully baked, remove from the water bath and allow it to cool to room temperature. Dry the paper thoroughly, then remove the marijuana. You can use it or store it in a sealed container for future use.
Alternatively:
Instead of following the steps above, you can use the water displacement method for decarboxylating marijuana.
What is the decarboxylation of marijuana by water displacement method?
Here is how to do it step-by-step:
- Put the cannabis in a freezer bag and ensure that 80% is closed.
- Put the container in a container filled with water carefully until all the air inside the bag comes out.
- After the water level gets near the zipper, close the bag fully.
P.S: The displacement method of water ensures that no air mixes with the marijuana during baking.
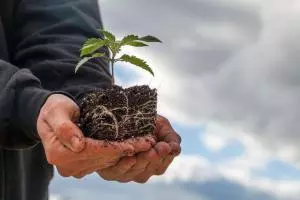
Speaking from a growing coach’s standpoint, the phrase Amsterdam cannabis seeds is synonymous with quality and heritage. In Amsterdam, acknowledged as the world capital of cannabis, these seeds are a testament to years of cultivation expertise and genetic refinement. For growers, this means access to a repository of genetic excellence, offering a gateway to cultivating crops that embody the rich heritage and botanical prowess that Amsterdam has been known for, fostering a cultivation journey marked by quality, yield, and potency that is truly second to none.
This Post Has One Comment
Pingback: URL