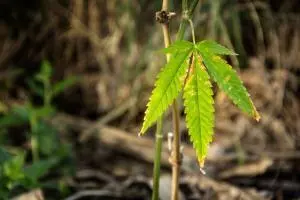
Like all plants, cannabis relies on essential nutrients to survive and grow. Essential nutrients required by the plant are Nitrogen, Phosphorus, Potassium, calcium, and others. Plants need nutrients at different levels of growth. An artificial combination of these can be purchased from agricultural stores. Alternatively, you can get the same nutrients from Homemade Cannabis Fertilizer to enrich cannabis.
Homemade organic fertilizer is more superior compared to synthetic ones. It supplies your crop with macro and micronutrients giving cannabis-enhanced growth. Chemical fertilizers provide the plant with these nutrients, but the effects are adverse. They are from chemicals, making them harmful to the ecosystem.
Inorganic residues from chemical fertilizer remain in the soil, causing hardening of the soil, ripping the soil off oxygen, and killing microbes to improve the soil structure. Chemical fertilizers go through the manufacturing process to arm them with nutrients like Nitrogen, Phosphorus, Potassium, and sulfur. The nutrients can be combined or manufactured singly. They rapidly increase crop production because they feed the plants, but they don’t last long in the soil.
Many cannabis growers are aware of the benefits of homemade fertilizers. They desire to reap a bumper harvest that is free from harmful elements and, at the same time, maintain the soil fertility for the future crop. Growers are now choosing to fertilize their crops with homemade fertilizer.
Advantages and disadvantages of homemade fertilizer
Homemade fertilizer gives you the best results when you prepare and use it well. However, there are both disadvantages and advantages of homemade fertilizer.
Pros
- Homemade fertilizer improves soil structure. Improved soil structure facilitates the holding of more water and nutrients.
- The ingredients used are locally available materials like kitchen waste and dry leaves. Most of them do not require purchasing.
- Homemade fertilizer is safe to use. It rarely harms plants because it does not have chemical compounds, and nutrients are slowly released, thus preventing over-fertilizing.
- All homemade fertilizer is biodegradable, renewable, and thus eco-friendly.
- The fertilizer is natural, with no chemical interventions. Decomposition is allowed to take place naturally.
- Vital nutrients are retained in the soil for a long time. This enables the plants to benefit gradually and maximally.
- It boosts your plant health naturally and enhances growth.
- It is easy to make at home fertilizer.
Cons
- Homemade fertilizer may lack primary nutrients such as NPK (Nitrogen, Phosphorus, and Potassium). These are vital for making the plant-strong, leafy, and hardy to resist diseases.
- It may take a long to get the desired results. Homemade fertilizer relies on microbes to convert the organic nutrients into inorganic absorbable nutrients.
- Even though the ingredients for making homemade fertilizer are easy to get, they may be expensive.
- The process of making the fertilizer is quite long and engaging. Ingredients ratios are not well defined, and this makes you err when balancing the nutrients.
The 11 ingenious ways to make your own fertilizer
There are varied ways to make your own fertilizer at the comfort of your home. This saves you a ton of money and guarantees toxic-free fertilizer for your crop. Below are some of the ways you can make fertilizer for your garden.
Animal Manure

Animal Manure consists of excreted products from cows, horses, chickens, rabbits, pigs, and even goats. It is very high in Nitrogen, Phosphorus, Potassium, Manganese and other nutrients required by your plants to grow healthy.
Decomposed manure is recommended to use in your garden because it is less acidic and has balanced nutrients. On the other hand, raw manure is highly acidic and is more loaded with excess nutrients than your plant requires. It burns your crop and lead to heavy losses.
Pros
- It improves soil structure.
- Animal manure increases soil carbon and, at the same time, reducing atmospheric carbon. This action stimulates the growth of microorganisms, which assist in the biogeochemical process.
- It is fully equipped with micro and macronutrients. When you compose and cure it well, the nutrients are very safe for your plants.
- Animal manure is easily accessible. It comes from livestock waste and, therefore, easy to come by.
- Manure is cheap.
Cons
- Raw manure is highly acidic. It can destroy your crop.
- The process of composting manure is long. It takes up to a year to compost.
- Animal manure can be highly contaminated with disease-causing organisms, antibiotics, hormones and pesticides and viable weed seeds.
- Manure is disgusting to handle. Fecal matter produces an offensive strong odor.
Coffee Grounds
You can make your own fertilizer using coffee grounds. These are good for acidifying your soil. Cannabis plant thrives better in slightly acidic soils. If the soil is alkaline, the crop tends to have stunted growth.
When added to the compost, it enhances the ecological and chemical composition. This facilitates the growth of earthworms. Earthworm’s excreta are essential for the development of microbes, which are important for decomposition.
To prepare the fertilizer, all you need to do is to spread the coffee grounds on the soil, or you can make an acidic liquid by soaking it for a week and sprinkling it in your garden. Your plants will enjoy and give you a bumper harvest.
Pros
- Coffee grounds are a natural, cheap, and organic insecticide. They act as a repellant to harmful insects such as cutworms, slugs, snails, and caterpillars.
- They improve soil quality.
- Used coffee grounds improve soil drainage and retention. Mixing coffee grounds thoroughly with clay soil will help it to drain better.
- Coffee grounds aerate the soil. Well-aerated soil allows roots to absorb nutrients and moisture effectively.
- They promote the growth of good worms such as earthworms. Earthworms’ excreta are essential for the growth of microbes, which break down organic matter.
- The coffee ground can be used for mulching to retain moisture content.
Cons
- Coffee grounds can compact and form water impenetrable solid barrier over the soil.
- Caffeine, an active ingredient in coffee, can inhibit seedling growth.
- Its antibacterial properties can kill good microbes in the soil.
- Used coffee grounds may be ineffective because they are not acidic.
Worm Castings

Worm castings are harvested from earthworms’ feces. They make excellent organic fertilizer.
The castings are also known as vermicast, and they are essentially fecal matter excreted by earthworms. The worms feed on compost and poo ball-shaped castings, which keep the soil aerated and properly drained. They contain all the nutrients required by your plants.
Steps of making vermicast (vermicomposting)
- Layer a special worm box with sand and strips of moist newspaper. (You can buy worm box at the local store)
- Add organic matter and layer again with strips of moist newspaper and soil.
- Place worms into the box. Add garden and kitchen food waste.
- To harvest, the vermicast spread a plastic sheet and empty the worm box. Collect the warms and add them to your vermicompost bin to aid in the decomposition of organic matter. The leftover vermicast can be spread in the garden.
Pros
- Neutralizes soil PH levels.
- Worm castings are a natural pest repellant.
- They protect plants from diseases by extracting harmful microorganisms and leaving the important ones.
- The process adds more worms into the soil, which breaks down supplements into absorbable matter.
Cons
- Vermicomposting is time-consuming.
- Making the worm castings is an expensive process.
We wrote an extensive guide on making your own worm composting bin. Which saves you alot of money by making your own worm compost from home.
Eggshells

Eggshells make fertilizer that is rich in calcium. They are the cheapest way to provide lime to your soil. Lime helps to lower soil acidity. Cannabis plant requires a fairly acidic soil to grow, but you may require lowering it with lime. The scientific name for lime is calcium carbonate.
An eggshell is 93% calcium carbonate. To make eggshells fertilizer, simply clean and crush the egg shells. Sprinkle them in your garden.
Eggshell fertilizer is more superior to other types of homemade fertilizers, especially if you are looking for high calcium concentrations for your garden.
This is the main advantage; nevertheless, there are a few disadvantages. To reap maximum benefits of this calcium-rich homemade fertilizer, consider these pros and cons.
Pros
- Eggshells keep the soil balanced organically.
- The fertilizer decreases high levels of acidity to a lower level or alkaline level.
- It improves soil texture and aeration.
- Eggshells repel insects and kill harmful insects.
- The fertilizer improves the germination of your cannabis seeds.
Cons
- The fertilizer overdose can be harmful to your plants.
Banana Peels
Bananas are rich in potassium, and so are the peels. Potassium is essential for making plants resistant to diseases. Cannabis is susceptible to several diseases such as Fusarium wilt, powdery mildew, leaf septoria, and verticillium wilt. Potassium helps to prevent these diseases from attacking your crop.
Make banana peels fertilizer by burying shredded peels in holes or trenches next to your plant stem so that they can decompose naturally. You can also prepare your fertilizer by adding shredded banana peels in a jar of water. Leave it to sit for a couple of days. After 2 or 3days, discard the peels and use the water to water your plants.
Another alternative will be to dry the peels and grind them in a spice blender. Sprinkle directly to your garden or gently mix with the soil. Your plants will be supplied with the much-needed potassium throughout the growing period.
Pros
- Banana peels fertilizer provides your crop with potassium, which is rare to find in other natural ingredients. Potassium is an essential nutrient responsible for increasing the weight and density of the flowers.
- It boosts the germination process and the proper development of roots.
- It acts as an aphid repellant.
- Banana peels manure makes plants resistant to diseases.
Cons
- Banana peels fertilizer has very high potassium contents, which, if over-fertilized, can be harmful to our plants. High levels of potassium can disrupt the absorption of other nutrients leading to deficiencies.
Wood Ash

Wood ash lovers acidity of the soil due to its alkaline nature. It is rich in potassium, which is vital for flowering of plants. Other nutrients present are iron, manganese and calcium. Wood ash is derived by burning wood into ash and sprinkling it on the garden.
Younger woods are richer in supplements than older ones. Hardwood trees also contain more supplements than soft wood.
Pros
- It has antibacterial properties, which kill disease causing organisms.
Cons
- Wood ash is not suitable to use on cannabis plants because of its alkalinity. Cannabis thrives in acidic soil so wood ash fertilizer is not suitable.
Diluted Urine
This may seem like a crazy way of making fertilizer, but, yes, diluted urine is very nutritious to the cannabis plant. It is important to note that urine contaminated by diseases or drugs can make your crops harmful to human consumption. You should never urinate on the plant as this can cause wilting and/or loss of your plant.
The application process of diluting the urine 3:5 parts of water with clean water and use it as a foliar spray.
We have no pictures included for this method, for obvious reasons. 😉
Pros
- Urine provides a good NPK ratio, which is essential during the vegetative stages of cannabis.
- It’s free and readily available.
- Its performance is similar to commercial fertilizer.
Cons
- Urine fertilizer has not been scientifically researched.
- Its hygiene is questionable.
- It contains salts that may be harmful to the plant.
Compost Tea

This is a liquid fertilizer made up of a mixture of supplements and aerobic microbes such as bacteria, nematodes, and fungi, which live in composts. It is made by separating the bacteria and the supplements from the compost. The process is similar to fermentation.
Compost tea is a superior fertilizer and one of the best nutritional supplements for your plants. It contains microbes-producing enzymes are produced by microbes that aid in chemically breaking down organic compounds into absorbable compounds. The microbe food in the compost tea feeds both the soil and the plants. Compost tea can boost cannabis yield because it is balanced nutrition-wise.
There are two types of compost tea; simple compost tea and the aerated compost tea. Simple compost tea is made by soaking compost into a jar of clean water and letting it sit for a couple of days. After two days, the tea is ready for application.
Aerated compost tea takes time to brew, and the process is quite complex. It requires oxygen to agitate. The result is a quality product with fewer odors.
To brew compost tea, you will need:
- Clean water
- 5-gal bucket
- Clear tube
- Air pump
- Electric socket
The ingredients required are;
- Clean water humus
- Microbe catalysts (such as sea minerals or rock dust)
- Microbe food (such as molasses and humic acids.)
It is important to note that using a wide range of ingredients is key to achieving quality compost tea. Here are the steps, which you can use to make quality aerated compost tea:
- Fill the bucket with water.
- Fasten one end of the air pump nipple and connect to the other end of the air pump. Fix the pump to an electric socket. Switch the power on and let the air diffuser sink into the bucket. Take care not to submerge the pump into the water. Once you complete this step, bubbles will start coming out from the diffuser, similar to those in an aquarium.
- Thoroughly mix your ingredients and brew for 12 hours. The brewing period should not exceed 48 hours.
Pros
- Compost tea increases nutrient cycling. Nutrient cycling is the process of breaking down nutrients into absorbable compounds.
- The fertilizer creates a healthy soil structure where microbes thrive well
- Compost tea uses less compost.
- The fertilizer prevents diseases by eliminating disease-causing organisms through microbial balance.
- It guarantees you a higher yield by improving soil fertility, which enhances the growth of cannabis.
Cons
- The preparation period is long.
- If you are planning to buy brewing equipment, it can be quite expensive.
Nettle Tea

Nettle tea fertilizer is derived from stinging nettle. It is added to the compost to stimulate fasten decomposition. Its high iron content makes the plant leafy and succulent. Nettle tea accelerates the growth rate of cannabis.
There is more than one process of preparing to nestle tea for your plants. The easiest one is where you fill a fireproof non-metallic jar with fresh or dried stinging nettle herbs. Boil the water and pour it into the jar containing the herds. Stir and wait for the brew to stand for 24 hours. After 24 hours, sieve it and spray as foliar diluted or undiluted.
You can learn more about different ways of making nettle tea fertilizer for your cannabis plants.
Pros
- It accelerates cannabis plant growth.
- Nettle tea provides free composting agents.
- It helps to fight aphids and parasites.
- It is loaded with macro and micronutrients as well as vitamins.
Cons
- It takes time to prepare (minimum of 24 hours up to 14 days)
Leaves

Leaves make an incredible organic fertilizer. To turn leaves into compost, follow these easy steps:
- Collect leaves and chop them into small pieces.
- Store the chopped leaves in a bag in a dry place.
- Add nitrate matter to the dry leaves to balance the carbon produced by dead leaves. Mix well at a ratio of 5:1 to reduce acidity.
- Hydrate the lime on the nitrate matter by adding water.
- Turn over the heap regularly to speed up the decomposition. Sprinkle water over the heap if it looks dry.
Alternatively, you can brew the leaves by chopping into tiny parts and soaking in water for several days. Keep the mixture tightly sealed to achieve an excellent brew of leaves.
Pros
- Leaves are easy and cheap to find.
- Both Brewing and composting does not require expertise. You can DIY at home.
Cons
- It will take you a long time to compost.
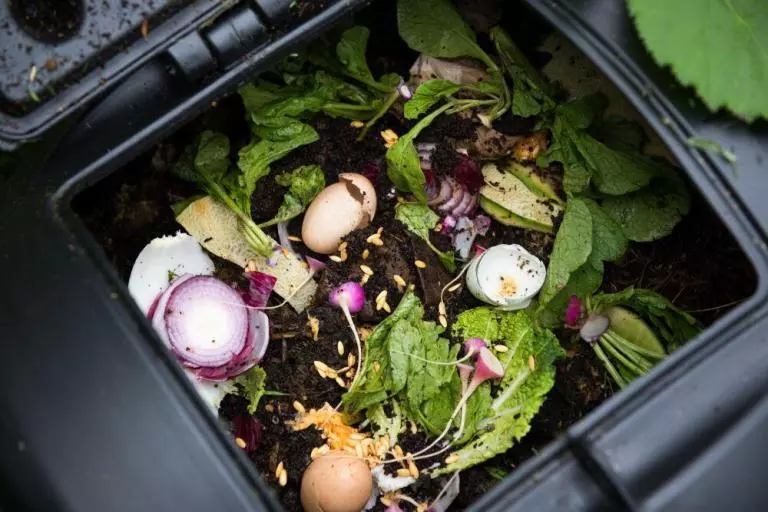
Compost

Compost is the organic matter produced through biological rotting of organic waste. The process, known as composting, is done under controlled aerobic bins. It is important to note that composting eggshells, banana peels, wood ash, leaves, and any other material before use as fertilizer is best. Microbes break down these ingredients during decomposition, making the present nutrients easily absorbed by your plants.
Easy composting steps
- Place your compost bin on sunny, flat, and well-drained ground.
- Spread twigs on the bottom to allow proper drainage and aeration.
- Add a layer of leaves and alternate it with layers of brown and green matter. Brown matter includes dried leaves, shredded paper cartons, and newspapers, while green matter includes green waste, flowers, vegetables, and fruit peels. Do not use fat, dairy products, invasive weeds, pet waste, or cooked food.
- Keep adding the kitchen waste as they accumulate until the bin is full.
- Every time you add fresh waste, mix thoroughly with the lower level. Check the bin regularly to make sure it is moist. Turn the mixture weekly to breakdown the process and eliminate odor.
- After 5 to 6 months, your compost is ready for harvesting and use in your garden.
Pros
- The Composting process naturally breaks ingredients into absorbable compounds.
- Though the process consumes time, it is cheap to make compost.
Cons
- It is time-consuming. It takes 4 to 6 months to make.

Final Thoughts
The process of making your own manure at home can be quite engaging, but it is worthwhile. You will shield your crop from harmful substances that can pose a danger to your health and other consumers of your crop.
The DIY tips are not only interesting but will make your sharpen skills to use cheap, locally, and easily accessible biodegradable materials, which you would have thrown into waste bins for disposal. It satisfies to make your own manure and tender your cannabis crop for guaranteed quality and bumper harvest.