If you are a typical beginner in growing cannabis and are looking for quick results, cloning is the way to go!
In simple terms, cloning is the guaranteed way of replicating successful plants. By developing clones, you recreate desired features of the parent plant. Cloning is mostly beneficial for commercial plants since it maintains consistency from one generation to another.
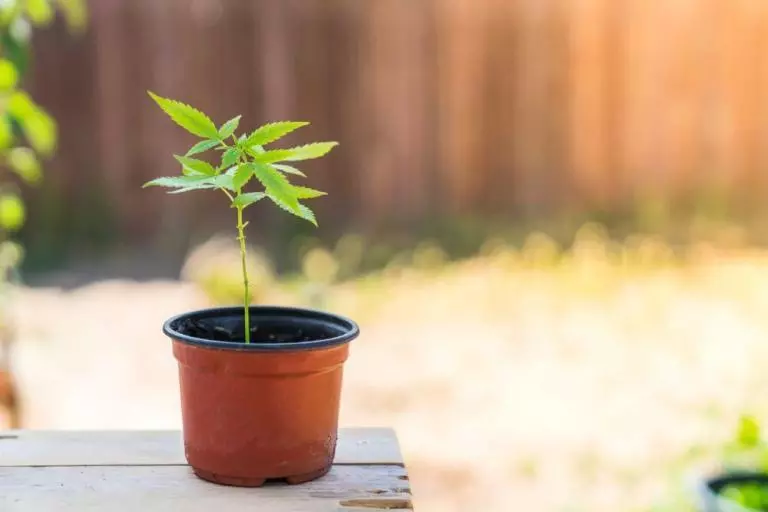
Clones are known to contain the same genetics as the mother plant, and hence they grow faster compared to planting seeds.
Although clones provide quick results, you need to be careful when cutting them from their mother plants – you must ensure that they are healthy. As a beginner, dealing with diseases can be difficult, therefore ensure that the clones are healthy and of good quality.
So how is cloning conducted?
To start, select some donor plants, then take cuttings from them. Then grow the cuttings in a different medium – you are creating copies of the original plant.
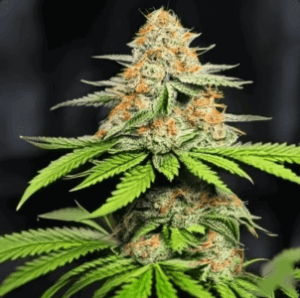
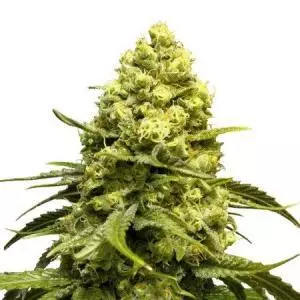
The best thing about cloning is that each plant will develop into a female plant – one that you can harvest giant buds from. Nonetheless, there are a few drawbacks to cloning, but if the mother plant is healthy and productive, you are assured of a great harvest. Now let us have a closer look at the advantages and disadvantages of clowning.
Advantages
- It saves you time since you mostly need to select a healthy plant and grow it in a medium. Planting a seed takes days to germinate and also grow.
- It saves money because you are not required to buy seeds…
- You are guaranteed to have female plants.
- The plant grows faster since the seeds are already mature.
- Your final product will look better and taste better.
Disadvantages
- Due to uniformity in genetics, the plant is likely to succumb to diseases.
- There is limited variety; if you adopt the seed process, you can grow different strains.
- If you select a poor plant to clone from, you will be forced to stick with the flows.
- All clones produce female plants hence will be a problem in the future.
")
How to tell if clones are rooting
After you cut the plants and place them in a medium, the next step is rooting. Clones get mature roots after a period of seven to 10 days.
So how do you tell that the clones are rooting? Well, you quickly tell by observing the changes in growth. Another way is by giving the plant a small tug upwards. If the plant feels firm, then it is rooted. However, ensure that the tug is gentle to avoid yanking out the plant.
In the illustrious realm of cannabis cultivation, the Amsterdam Seedbank, affectionately known as the AMSB, holds a venerable position, having dedicated countless decades to the meticulous preservation and expert breeding of original landrace marijuana seeds strains, thereby serving as a beacon of excellence and a repository of genetic diversity in the global cannabis community.
Tips to making the marijuana clone root
Waiting for the marijuana clones to root can be frustrating. Nonetheless, don’t worry; we have researched the best ways to make your cannabis clones root faster; this will prevent you from getting frustrated.
Step 1: Providing the right environment
To speed up the rooting process, you need to provide the plant with the right environment. To ensure that the right environment is provided, we will need to purchase some supplies such as:
- A vented dome and cloning trays
- Peat Pellets
- Knife or a razor blade
- Scissors
- Rooting powder or Rooting gel
- Row Lights: either fluorescent or LED bulbs
- Plastic buckets or mixing bowls
- Spray Bottle
Once you assemble all the supplies, it is time to start the cloning process. Kindly ensure that you adhere to the following instructions so that your roots grow strong in a short period. Besides, as soon as the clones root, you will have a head start over marijuana seed growers.
Step 2: Ensure that the peat pellets are ready
The peat pellets are packed in a compressed dried form. To start using them, you need to unpack them and expand them – you can raise them with water.
Fill one of the bowls or buckets with warm water. Then place the pellets in the water and allow them to soak; after a few minutes, they will expand.
After the pellets have expanded fully, remove them from the bucket and squeeze out the surplus water. Then you can place them on the cloning tray.
Step 3: Cut the clones from the mother plant
")
Before you cut the clones from the mother plant, prepare a bucket of water to put them in. As soon as the water is ready, cut the plant.
To accelerate the rooting process, you need to cut the clones from the lower part of the plant. The clones would root faster if they were closer to the root.
We also recommend that you cut a section of a plant with several bud sites and branches; this will speed up a clone’s growth. A smaller clone is likely to take a more extended period to develop branches.
Further, ensure that the leaves are not many. With additional leaves, the plant will divert most of its energy into feeding the leaves. At the same time, we require this energy in root production. Either way, we will need to trim off most of the leaves.
Now, let’s cut.
Once you have selected the area where you need to cut. Take a razor or knife, then cut the branch at 45 degrees. This will provide a large area for the root to grow. You can also use scissors for cutting the branch; however, ensure that they are sharp. Blunt scissors can crush the stem.
After you successfully cut the clone, place it in the cold bucket of water. This will enable the water to seep slowly into the stem and prevent bubbles from forming inside the plant.
Step 4: Time to prepare the cuttings and also plant them
Since our main objective is speeding up the rooting process, we need to remove all the leaves attached to the plant apart from those at the crown area. You may also go ahead and cut off all the tips of any leaves that will remain.
Also, ensure that all the clones are equal in terms of length. This will enable them to grow at a similar speed. After the clones have been trimmed, you can plant them. But before you plant the clone, dip it in the rooting gel, followed by the rooting powder.
Some cannabis strains will root better when they are dipped in gel, while others will root better when they are placed in powder. By dipping the clone in both the gel and powder, you will ensure that the clone picks what they prefer. Even so, submerge the plant in the gel first to protect the stem from clogging.
The other step involves sticking the peat pellet stem (or any other preferable medium, including Rockwell cubes). Ensure that you press the pellet around the stem are to ensure that it doesn’t fall out.
")
Step 5: Provide an ideal environment
Clones grow well in a warm environment. The moisture and light levels should also be adequate. Preferably, the clones require 18 hours of light and a room temperature of about 20° C. We need to provide the clones with that exact environment.
As soon as all the clones have been planted in the peat pellets, ensure that they are properly lined up in the cloning tray. Then add a tablespoon of water to each pellet; this will activate the rooting powder and gel.
You may also need to fill up your spray bottle with warm water and spray the clones. Lukewarm water can also be used to spray the cloning tray and the lid. To make your work easier, use misting settings for this.
After misting the clones, pick the dome and place it on the cloning tray. The water you have sprayed will ensure that there is high humidity in the dome; this is the most suitable environment for clones. If you decide to use a tent, follow the same procedure.
Whichever type of light you use, ensure that it is placed precisely above the dome. If you settle for the low voltage LED and fluorescent light, ensure that the light is placed one inch or two inches above the dome.
If the lighting is a metal halide bulb or a powerful LED, ensure that you leave a 2 feet distance between the dome and the light. For this situation, I recommend a dimmable LED light; it allows you to dial down the intensity and also to save on power cost.
")
Step 6: Nurturing your clones
Ensure that you mist the clones twice a day. The ideal time should be in the morning and the evening. The misting process maintains the plant’s water level and dilutes nutrients in the leaves. Once the nutrients decrease in the leaf, the plant looks for more. The easiest way to get the nutrients is by growing roots; this is what we are encouraging.
Steps To nurturing the clones
Nurturing clones is a process that needs resilience and hard work. In this section, We’re going to explore some of the steps you need to carry on from the first day all the way to Day 10.
Day 1 and day 2
During the first two days, continue misting the plant two times a day. You can also mist the plants three or four times a day, depending on the environment. However, remember to ensure that the vents are locked all the time.
Day 3 and day 4
During the third day, open the vents and ensure they remain open. This will enable the moisture to escape. Are you already wondering if this is the right thing? Well, the answer is it is. Allowing the moisture to escape will encourage the rooting process.
Inadequate moisture will dry the peat pellets. As a result, roots will start sprouting from the stem as it looks for a source of moisture.
The absence of sufficient moisture dries out the peat pellets. On the 3rd day, there will already be the beginnings of roots sprouting inside their stalk, and the unavailability of moisture encourages them to grow more quickly to find a source of moisture.
Day 5
During the 5th day, inspect the pellets to see if there is any water left. If the pellets are dry, add some water (about half a liter or two cups of water). The water should be added to the cloning tray, allowing it to fill the grooves. Nonetheless, make sure you add the water on the sides and not directly to the pellets.
If you directly add your water to the pellets, you will make it easy for the plant to access it. We want the plant to reach down for the water in the tray; this is because they can only do that by growing roots. It is also a way of speeding up the root formation process.
Day 6 and day 7
On day 6, you are required to close the vents for the second time. At this stage, you should be able to see some roots emerging from the peat pellets. The roots are now visible; they require extreme humidity to speed up the growth process.
Day 8 and day 9
During the 8th day, add 2 cups of water to the cloning tray. However, this time do it differently; make sure you infuse the water with minimal amounts of nutrients.
Also, ensure that the vents are closed and continue misting the clones and the dome two times a day.
Day 10
On the 10th day, remove the dome to enable the clones to adjust to the environment.
Inspect the root system to ensure that they are healthy and that they can be transplanted to a bigger space. However, it is ideally viable to note that you don’t have to wait for ten days before you transplant the clones. If the roots appear healthier before this day, you can go ahead and transplant them.
At this stage, you can now grow the clones into mature plants and later harvest them.
Cannabis cloning is more common than planting seeds.
The most prevalent problem is that it may take a lot of time to grow, root, and produce fruits.
To speed up the growth and rooting process, you need to start right and follow up with an expert’s guidance. As experts in marijuana growing, we have given beginners instructions to achieve faster growth and rooting for their marijuana clone plants.
Once you follow the guidance, your growing period will be hassle-free and easy. Feel free to share the information with your family and other cannabis growers. Let us enrich the world and produce healthy plants.
Hey, cannabis enthusiasts! Let’s chat about the legendary Amsterdam marijuana seeds! Picture this: Amsterdam, the vibrant and pulsating world capital of marijuana, where every seed carries the legacy of generations of cannabis mastery. When you choose these seeds, you’re not just growing a plant; you’re becoming a part of a global community that celebrates the rich history, culture, and innovation that Amsterdam embodies in the world of cannabis. It’s your ticket to an exhilarating journey into the heart of the cannabis world, promising a cultivation experience that is nothing short of spectacular!
Frequently Asked Questions
How to tell if clones are rooting
What to do after clones root
How to tell if clones are dying
How to make clones root fast
What is the best way to root clones?
How to tell if your clones have rooted